Self Installation
How to Install Front Bumperduo Protector
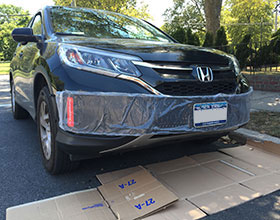
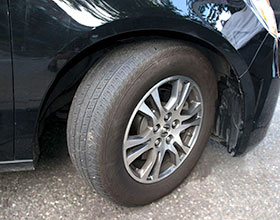
Basic Front Bumper Installation
-
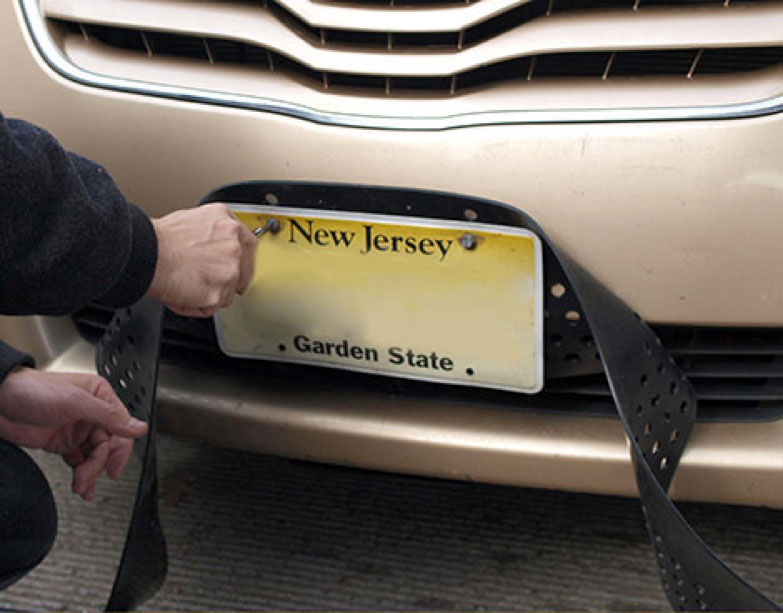
Remove license plate.
-
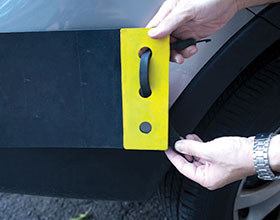
Level the pad, attach license plate. It will secure pad.
-
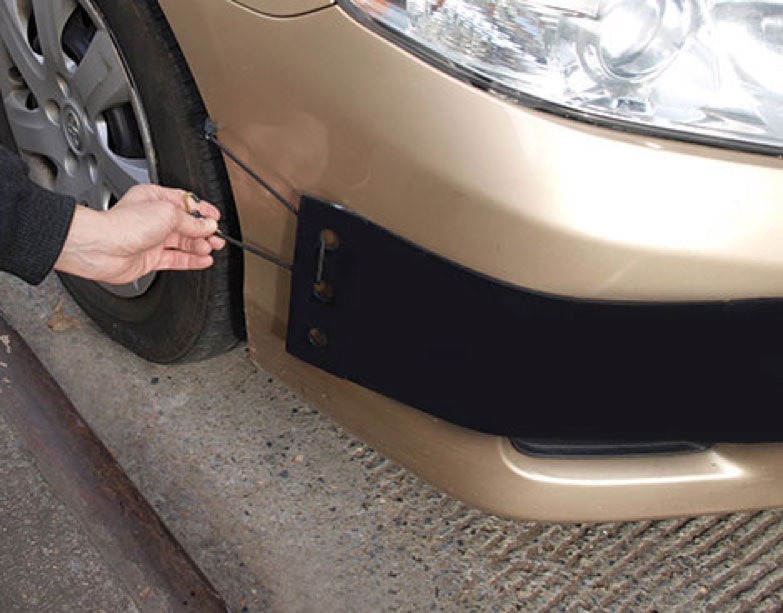
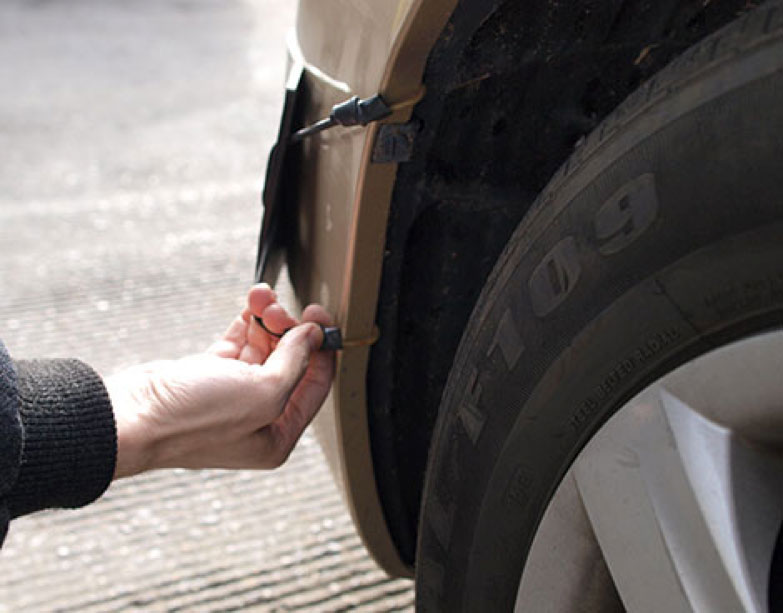
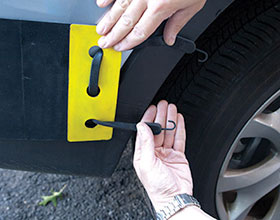
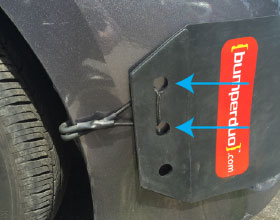
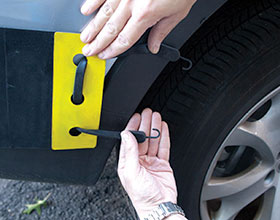
Insert bungee cords into Bumperduo holes.
-
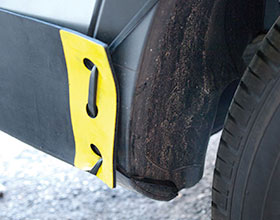
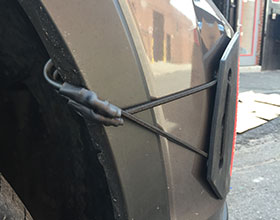
Snap on bungee cord hooks inside wheel well. Some cars have room to snap on hooks deeper in, higher up or lower down.
Bumperduo Installation for Fog Lights
Fog lights on cars come in different shapes and sizes. We advise that you use a puncture ring for the neatest cut.
Make sure to have the tools listed at hand and then continue with steps below.
- Pen / Marker
- Screwdriver
- Hammer
- Cardboard
- Fog Light Puncture Ring
-
Install front Bumperduo
-
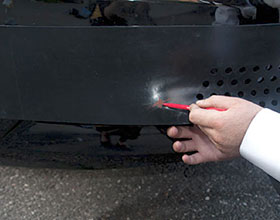
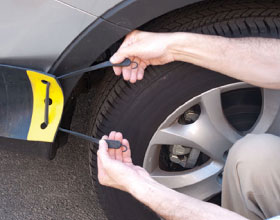
Locate fog light position behind Bumperduo and mark its location with pen or marker.
-
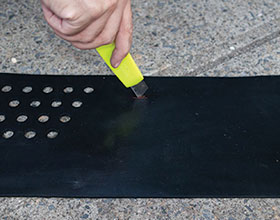
Remove Bumperduo and place it on cardboard.
-
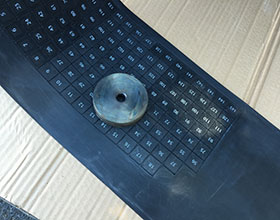
Place Fog Light Puncture Ring above the marked location on Bumperduo. Hammer out a neat hole for your fog light.

-
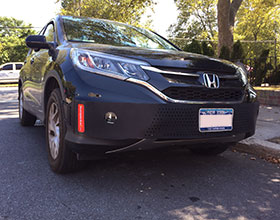
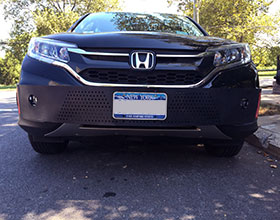
Reinstall Bumperduo.
WARNING! DO NOT BLOCK TURN SIGNALS.
Bumperduo Installation For Fog Lights Without Puncture Ring
Make sure to have the tools listed at hand and then continue with steps below.
- Pen / Marker
- Screwdriver
- Utility knife
- Cardboard
Follow steps 1-4 from Basic Front Bumper Installation
-
Mark center of fog light on pad with pen. Then, remove license plate and pad
-
Place pad on ground. Puncture the marked spot with utility knife.
-
Reverse pad. Trim out punctured squares. Do not cut out more than 2 × 2 squares.
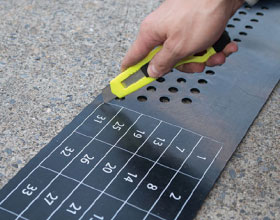
Trim out the same numbered squares on the other side.
-
Follow steps 1-4 from Basic Front Bumper Installation section to finish.
-
If the bottom section is cut out to make room for your fog lights, use only the top 2 holes on the sides of the pad to hook it to the fender. This will provide enough horizontal support. Do not use the bottom hole, as it will damage the pad.

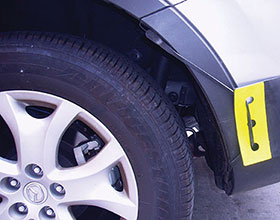
(The bumper protector edge is painted yellow for demonstration purposes only. Your bumper protector is not painted yellow.)
Tips on Bungee Cord Attachment to Wheel well
If your Bumperduo is loose, here are some useful tips on tightening and securing Bumperduo to the wheel well.
Looping
-
If space between fender and tire is slim turn wheel in.
-
If pad is loose unhook bottom fastener and insert through middle hole.
-
Insert again through bottom hole. If pad is still loose, continue to step 4.
-
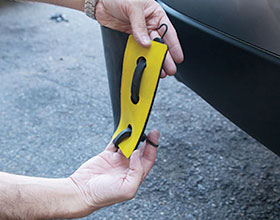
Loop it through the bottom hole and hook it back behind fender. This will shorten the fastener even more and tighten the pad.
Crisscrossing
After looping bungee cords through Bumperduo holes, crisscross cords and attach hooks inside wheel well.
Bungee Cord Resizing
Bungee cords come in three different sizes:
- 18 inches
- 12 inches
- 8 inches
If you find that the Bumperduo is not tight enough around your bumper, try using shorter bungee cords.
For the front only: you may use the top 2 Bumperduo holes for optimal fit.
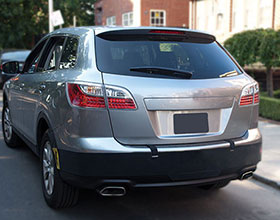
How to Install Back Bumperduo Protector
Basic Back Bumper Installation
-
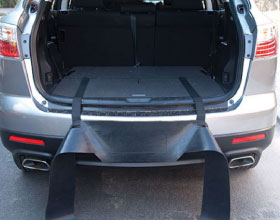
Attach Velcro straps to trunk carpet. (If does not attach, peel off white paper and attach Velcro stickers to trunk carpet or floor. For optimal bond allow stickers 24 hours to dry)
-
Insert bungee cords into holes. For optimal fit, 3 sizes of bungee cords are included: 18, 12 and 8 inches.
(The bumper protector edge is painted yellow for demonstration purposes only. Your bumper protector is not painted yellow.)
-
Snap on hooks behind wheel well. Some cars have room for snap on hooks deeper in, higher up or lower down.
-
Done!
Tips For Back Bumper Installation
Make sure to have the tools listed at hand and then continue with steps below.
- Pen / Marker
- Screwdriver
- Utility Knife
-
Do not block license plate: If your car has the license plate on the bumper, place the protector on the ground, then using a utility knife trim out license plate slot.
-
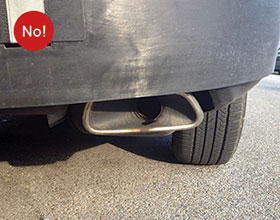
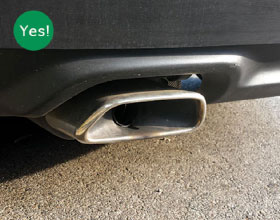
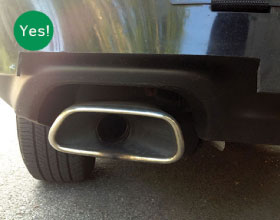
Do not block heat from exhaust pipe: If bumper protector covers exhaust pipe, trim out at least a 2-inch clearance. You may use guided lines on reverse side. Firmly secure Velcro® straps and bungee cords.
-
If protector is loose unhook bottom bungee cord and insert through middle hole. (The bumper protector edge is painted yellow for demonstration purposes only. Your bumper protector is not painted yellow.)

-
Insert again through bottom hole. If protector is still loose, return to step 3.
-
Loop it through the bottom hole and hook it back behind fender. This will shorten the bungee cord even more and tighten the protector.
-
Hook bungee cord inside wheel well.